| Share |
|
2017 |
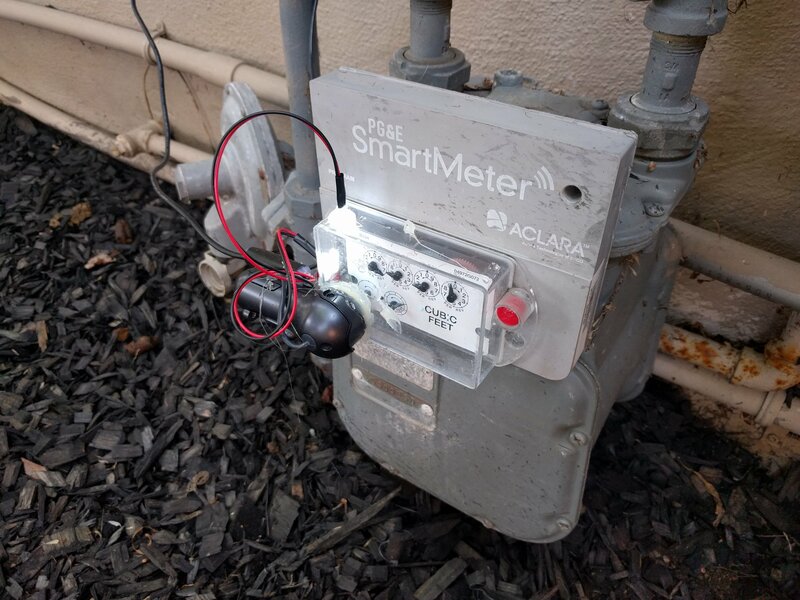
Computer vision meteringI have been very interested in monitoring various aspects of my house, such as water and electricity, and wanted to build a computer-based monitoring system to see what I could do to optimize my usage. By installing my own commercial grade water meter I was able to accurately measure each gallon of water going in to my house. But I wanted to monitor my natural gas usage, and there is no way a hobbyist is allowed to cut gas lines and install new gas meters inline. So I have a gas meter in my back yard, and it is easy to access and run cables to, but the meter itself just has a clear plastic box with some analog dials in it. The meter is remotely monitored by PG&E using some kind of RF transmitter that is powered by the gas pressure, but I don't have access to that. Some meters include something like an infrared pulse emitter to make it easy to perform external monitoring without breaking the seals on the housing. But my meter has nothing to help with interfacing. So there is nothing we can do, right? I also have a koi fish pond which has a water skimmer and pump. The water is filtered in the skimmer and constantly recirculated up into a waterfall to oxygenate the water and keep the fish alive. If the skimmer clogs up the pump will eventually fail due to lack of water and then the fish will die. The water can also evaporate and need refilling, and fill valves can get stuck permanently on and flood the pond. I figured this would be a great opportunity to try and do this the brute force way, by pointing a camera at the dial, capturing images continuously, and then using computer vision to calculate the angle of the dial. However, there are a number of challenges with this, and computer vision can be very finicky when used in strange real-world conditions. 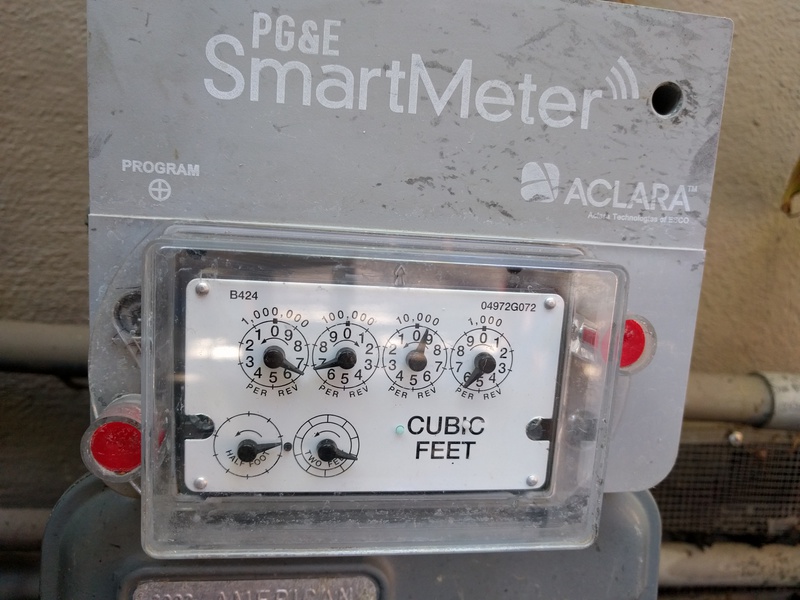
Gas meter camera mount and focusThe camera needs to be accurately mounted so that we can simplify the vision processing on the computer. I purchased some old Logitech USB cameras for ~$5 each that implement the UVC standard and work easily under Linux. These cameras run at 640x480 and give nice quality images that are good enough for this application. They are also cheap enough that I can afford to try experimenting and not worry about destroying a camera by accident. The lens on the camera is focussed to be used for video chat, but if you open up the housing, you can actually adjust the focus and turn it into a macro lens. I can place the camera right up against the clear housing of the gas meter, and get it to focus perfectly on the dial from about 1 centimeter away. The dial covers almost the entire 640x480 sensor, and the image below is a great capture of the dial for vision processing later. With the camera directly on the clear housing, I ran hot glue around the edges to lock the camera in place. The advantage of hot glue is that with enough force, the camera will break away cleanly from the meter housing, and I am not destructively changing the meter in any way. One interesting problem with the hot glue is that in summer time, it gets so hot in the direct sunlight that the hot glue can melt. When this happens, the camera can fall off or shift and lose calibration. You need to use some silicon rubber as well, which also removes cleanly, but it takes a day to cure. So the trick is to use both ... hot glue fastens quickly, allowing you to get things in position and lock it down. Silicon provides long term stability and you don't need to hold everything in position with tools while waiting for things to cure. Definitely don't use epoxy because this will permanently bond to the plastic and you can never remove it! 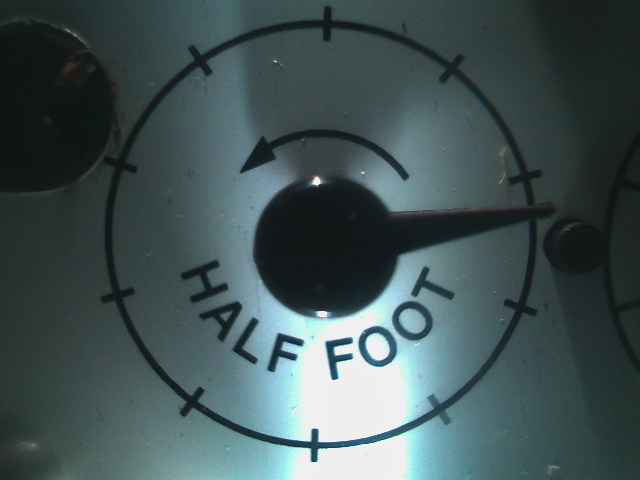
Gas meter lightingThe gas meter is outside, and during the day the dial is nicely illuminated with no shadows. At night, everything is pitch black, and the USB camera sees nothing. By naively adding some lights facing the dial, it will allow the camera to see the dial at night, but the light will cause the dial needle to cast a shadow on the white background. Any shadows will typically be very dark and the vision code will confuse them for the real needle we are trying to track. The trick is to mount LEDs above and to the side of the dial, enough to illuminate the background, but at an angle that does not cause the shadows to land on the white background. The image above shows what I was able to achieve with 2 white LEDs powered via a 5V USB cable. There are still some shadows, but they are pretty minor. Adding more LEDs in different positions, or a ring of LEDs, would help to improve the image further, but I wanted to simplify the hardware and do as much in software as possible. Once the LEDs are in the right position and orientation, more hot glue is used to fasten them to the clear housing, and can be easily removed later with enough force. With lighting, I could consider covering it up to use only consistent artificial light, but there is no need since the day and night images are quite similar. 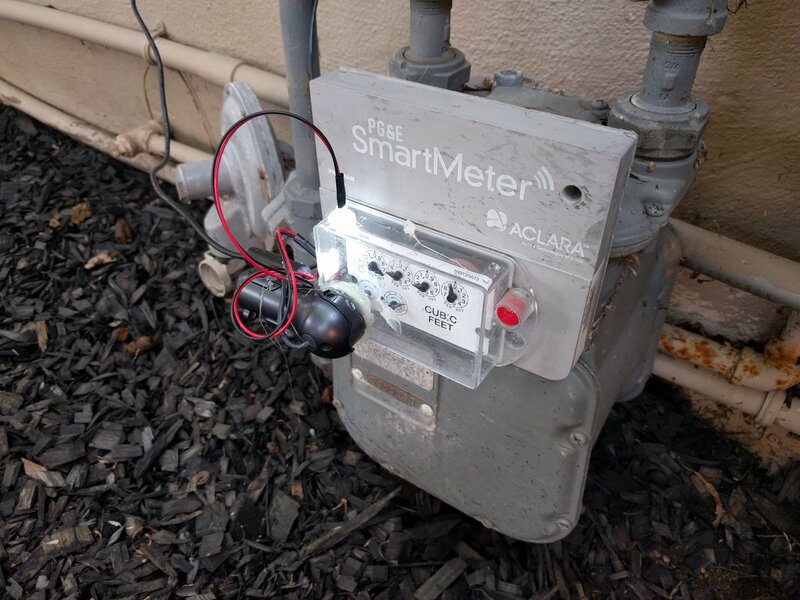
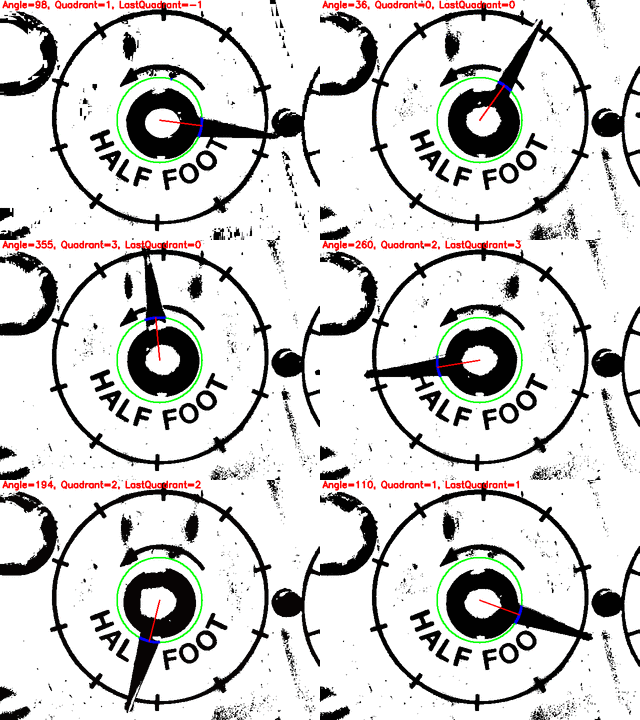
WeatherproofingEven though it is under cover, everything will still get wet from moisture in the air or when watering the garden. Insects also love to build nests inside your electronics. You really do need to seal everything up as tight as you can. Some of the LEDs started rusting and burnt out when some water was dragged in via capillary action along the wire. One of my small computers was also destroyed when some moisture built up and condensed onto the circuit board and caused it to rust. Initially, I put the computer module into a plastic bag, and wrapped twist ties around the neck to stop insects. You need to mount the computer upright so that the cables leave downwards. This way if water is on the cable, it falls off rather than trickling into the bag. This is very common when wiring outside cables through a wall into a house, and is referred to as a drip loop. I also put another plastic bag around the camera and lights, and attached it with some tape to the gas meter, to keep the electronics dry as well. The bag around the camera and lights is not as tight a seal as I would like, but so far is working fine. Having the computer sealed up in a bag works ok, but it is terrible for maintenance because you need to open it all up and do it all again each time you want to change something. I have now been starting to use SOCKiTBOX plastic housings, which are designed for outdoor electronics, and have an easy to use lid that keeps water out. They are cheap and work really nicely, the only catch is they are not transparent. 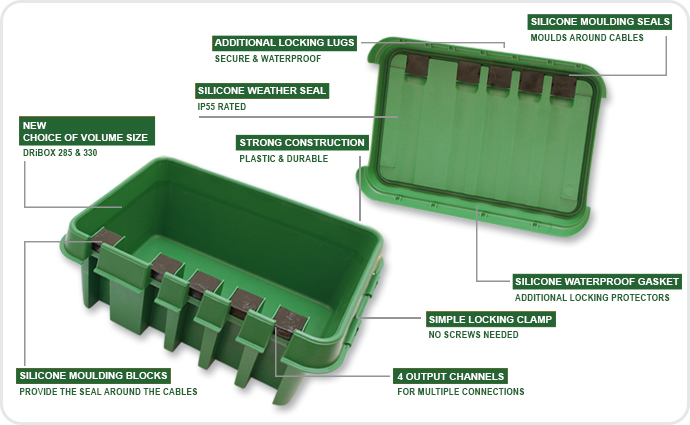 SOCKiTBOX plastic housings LinuxThe USB camera needs to be processed on a computer, and since we are processing simple images at a relatively slow speed, almost any simple Linux device will work. I have been using Pogoplug v4 devices, which I purchased in 2014 for less than $20. These devices run a MIPS processor, 128 mb of RAM, provide Ethernet and USB3 ports, and support a proper Debian install which is pretty easy to set up. I got these cheap many years ago when there were limited options for cheap Linux hardware, but there are now plenty of other options like Raspberry Pi that you can use. The Pogoplug is actually really slow with not much memory, but it is still fine for this task. Instead of trying to run a USB extension so the computer can be indoors, I locate the Pogoplug outdoors near the camera. A proper USB extension cable to an indoor PC would actually cost more than the Pogoplug as well! Also, I used a PoE injector, so that I could run only a single Ethernet cable to the device, and power it remotely, since there are no power points near the gas meter. PoE can be done according to the standard with expensive equipment, or with very cheap $10 custom adaptors at either end to your existing device power supply. While it works for low powered devices, it will fail to provide enough voltage to devices that pull large currents over very long cables. Gas meter algorithmUsing OpenCV makes this really easy to implement, and you can easily install the libraries with apt-get on the device. Because this is a real Debian Linux machine, you can actually develop the code on the device, and see the output with X11 over SSH. To speed up development, I captured some test images and then developed most of the code on my x86 laptop. OpenCV provides functions to read from USB cameras and store them in its own image format. I use adaptiveThreshold() to make the image either black or white. An adaptive threshold is important since it measures the difference in brightness between pixels and not globally across the whole image. Even with the lighting, the shadows are actually quite dark, almost as dark at the dial needle itself, and the adaptive threshold makes separating this a bit easier. The next step is to walk around the image in a circle, just outside of the black round center of the needle, shown in green in the animation below. The goal is to traverse all the white pixels, and keep track of the angle when we find a black pixel - these matching pixels are shown in blue. This is tricky because the circle needs to be positioned to capture only the needle and not the center of the dial or the shadow that it casts. The text and arrows on the dial don't help to make this any easier either. Whenever we find a black pixel in this circle, we treat the angle as a vector, and accumulate it to a total. Then, divide the total by the number of points found. This will compute the average of the direction the needle is pointing. It is very important that you don't compute the average of the angle, because this does not work when transitioning from 359 to 0 degrees, or from -180 to +180. The final vector computed is shown in red in the animation below. Even though there are lots of shadows and other problems with the image, because we are averaging many vectors the overall result is quite robust. Finally, we need to detect the rotation of the needle, and work out when it has done a full rotation. This is not as easy as it sounds, because the needle can wiggle backwards a little bit, and also the computed angle can vary between frames due to noise. So we divide up the dial into four quadrants, and track the motion from quadrant 0 to 1 to 2 to 3. If the needle goes from 0 to 3, we know it went backwards and ignore it. If the needle goes from 3 to 0, we know we have logged a full rotation. If the needle skips a quadrant, we are not sampling images fast enough and somehow missed a step. The dial doesn't move that quickly, so sampling every 5 seconds is fine. Each rotation is one cubic foot of gas, and I log this as an integer. However, I could log smaller fractions if I wanted to, the algorithm can detect angles quite accurately, but a cubic foot is a very small unit as is. 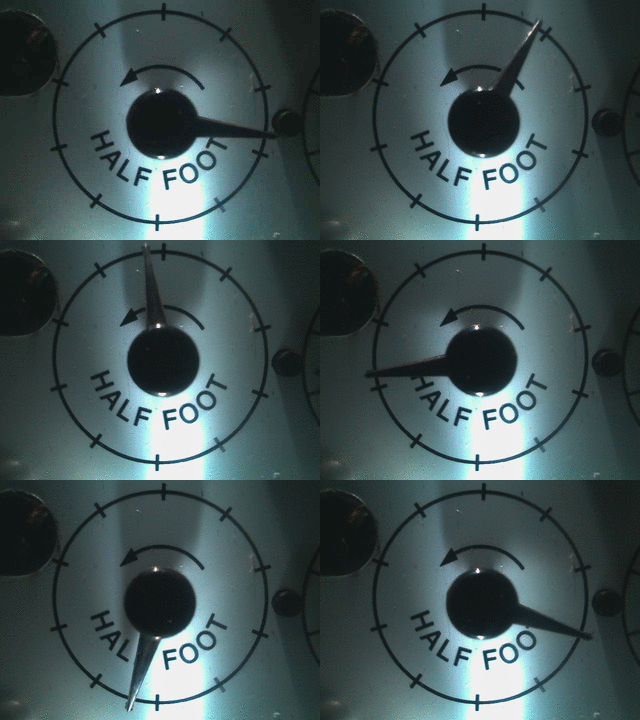
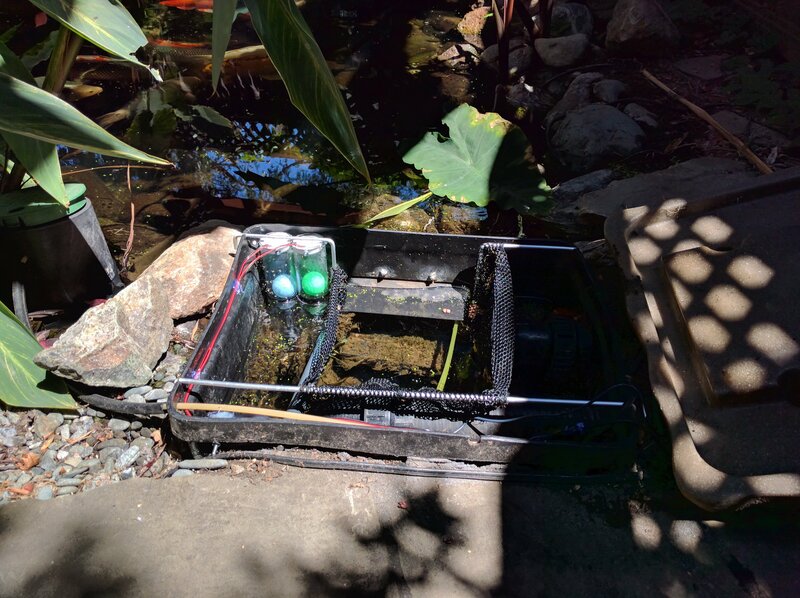
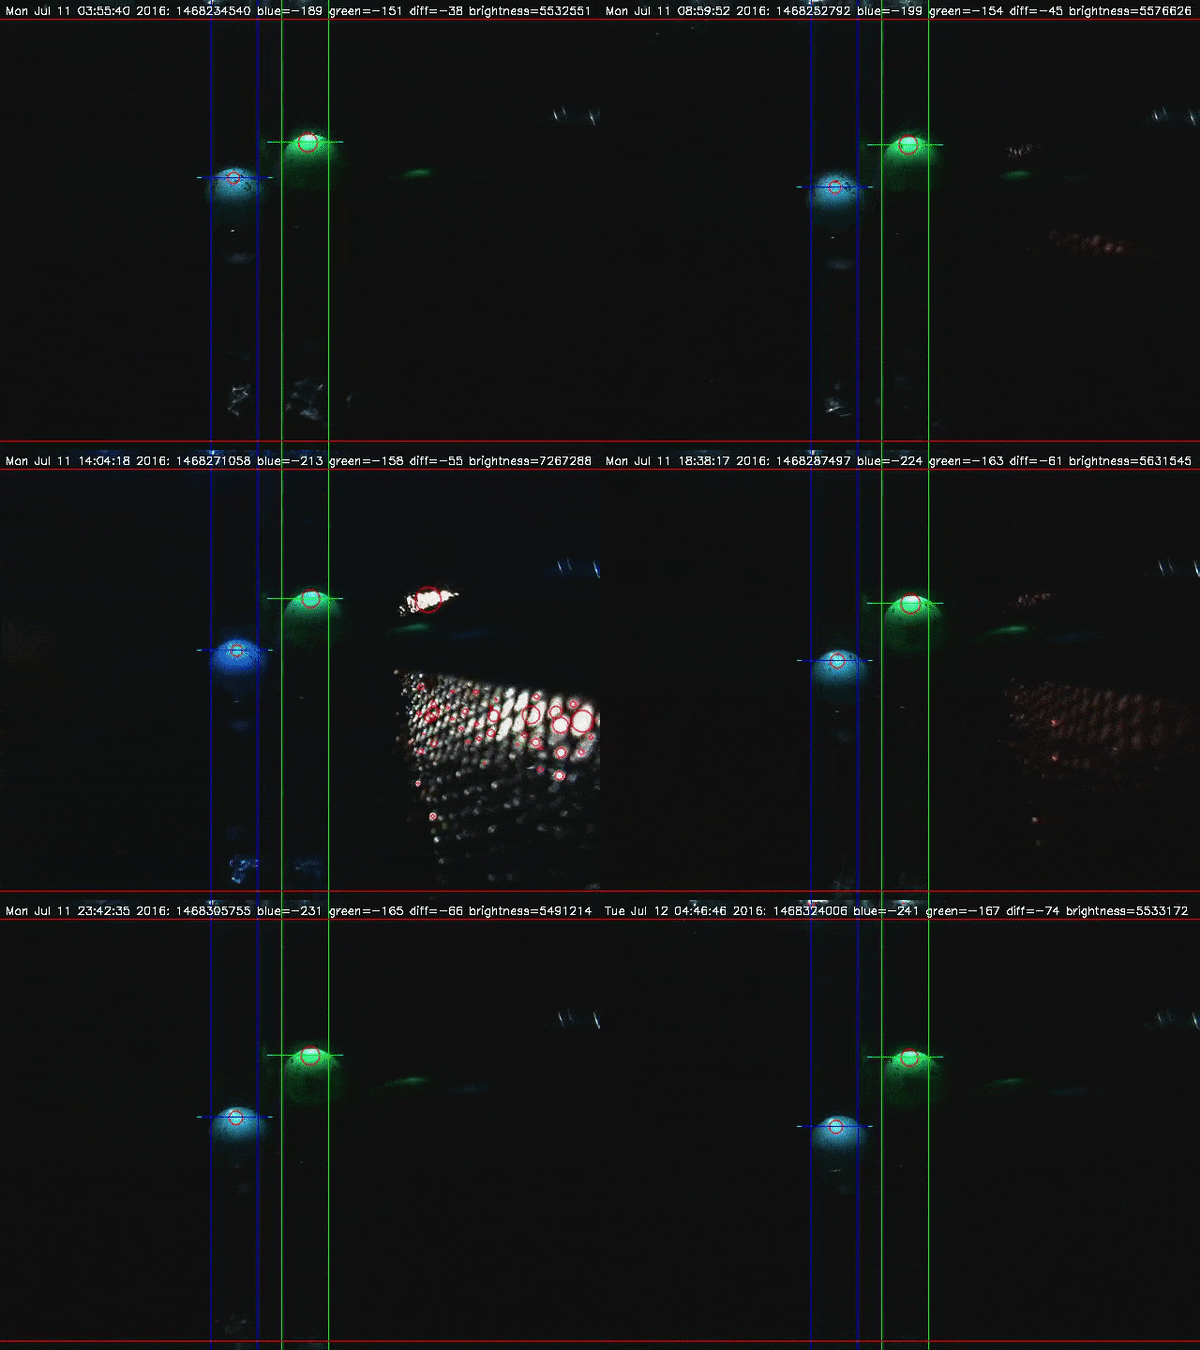
 Koi pond camera and lightingThe easier solution is to use water level switches, ultrasonic distance finding, or water pressure, but this has limited resolution, requires calibration, and specialized sensors. I wanted to explore using just regular cheap USB cameras, which have at least 480 lines of resolution for determining depth. I mounted two acrylic tubes into the skimmer, with colored ping pong balls for a simple tracking target. The camera is mounted on the opposite side of the skimmer and it has a complete view of the entire tube. The left tube has holes in the bottom to show the depth after the filter, while the right tube has a hose going to the main koi pond to show the water level before the filter. The difference in heights can be used to determine how clogged the filter is. The tubes may need maintenance a few times per year to clean off algae that might grow on the surfaces and block the camera. The pond skimmer normally has a lid on it, so it is completely dark apart from some sunlight that reflects through the entrance. This makes the conditions ideal for vision because everything is dark by default. Each tube has a top cap with a hole drilled through that holds a white LED. After soldering wires on, the LED and wires are potted into the cap using Loctite marine epoxy to seal everything from the water. The two LEDs are connected to a resistor and then connect to the 5V USB port on the computer that provides the few milliamps needed for the lighting. The LEDs can sometimes have algae grow on them and reduce the light, so if the vision algorithm fails they need to be brushed clean. The LEDs make the ping pong balls glow in the darkness, and there are only reflections below the ball and not above. The camera needs to be aimed so it either cannot see the LEDs, or put black tape across the top of the tube to block this out. Koi pond algorithmOnce again, using OpenCV makes this easy to implement. The image is firstly converted to grayscale, there is no need to actually use the ball color because we know which tube each color is located in and the tubes are aligned vertically. Each tube has a left and right X range as the center of the tube, so perspective distortion doesn't cause any problems. We then walk through the image looking for pixels exceeding a threshold and if there are more than two the row is considered a match. We always try to find the top of the ball and not the center, since the water distorts the shape of the bottom of the ball and it is not a perfect circle or oval. The top is much more consistent and easier to find reliably, especially when the tube gets dirty with algae. The results are very accurate and sub-millimeter accurate, as shown in the animation below. It is very robust to sunlight leaking in on the right, and can handle moderate amounts of algae growth. I designed this system in 2016 and it is still in use in 2023. It can very reliably predict when the filter is getting too dirty and can send notifications to perform a manual clean. It can also detect pump failures when the tube levels are exactly equal, when the water level gets too low for the pump, or when too full and overflowing. It can also measure changes in the height of the water that are not visible to the human eye. I have observed slow changes over the day where it appears as though the water level is varying due to heat expansion. I could also measure the amount of water being consumed by plants in the pond that eventually needed to be removed in this video. 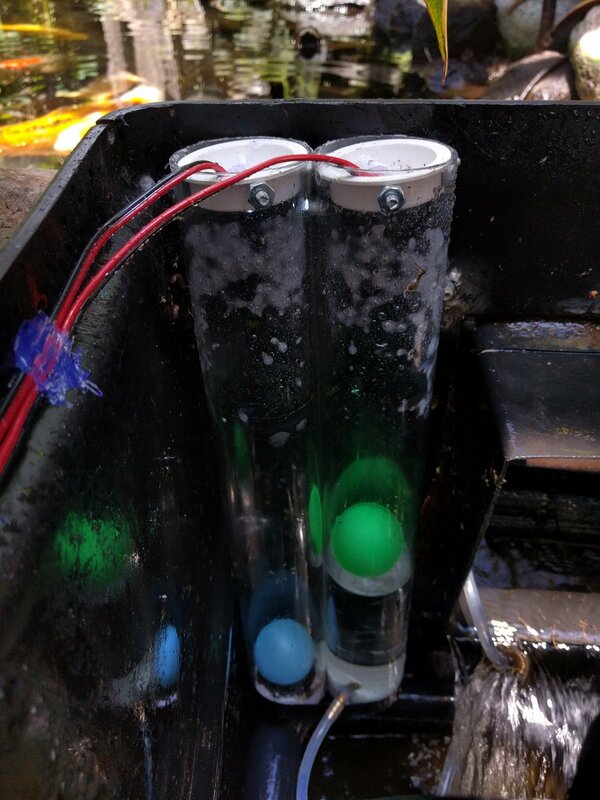
|
| Share |
|
2017 |

Google Developer Advocate 2014-2023
X-Plane plugins and apps for flight simulation
IoT water meter monitoring
IoT computer vision monitoring
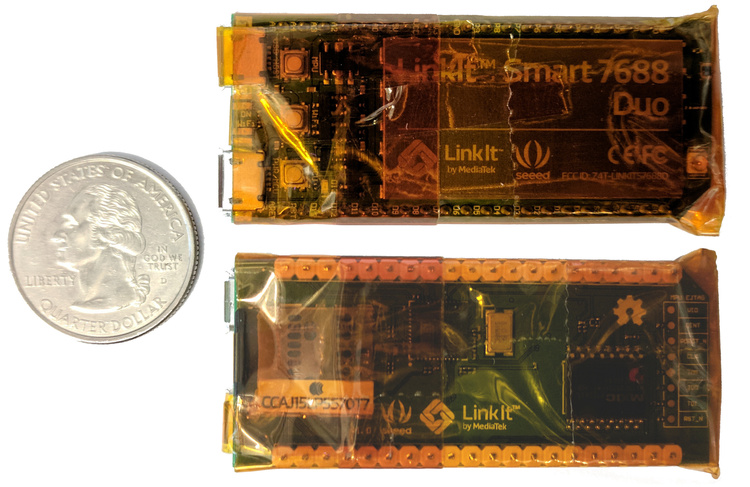
Tiny and cheap offline Wikipedia project 2017
Outdoor augmented reality research
Tinmith 1998-2007
Outdoor augmented reality 3D modelling
Tinmith 1998-2007
Outdoor augmented reality gaming
ARQuake 1999-2007
Scanned physical objects outdoors
Hand of God 3D 2006